Makeup Blog

HQ TESTS: 10/10 ILLAMASQUA REVIEWS

Illamasqua Reviews: 10/10 Collection Experimental Eyeshadow Palette | HQhair Blog

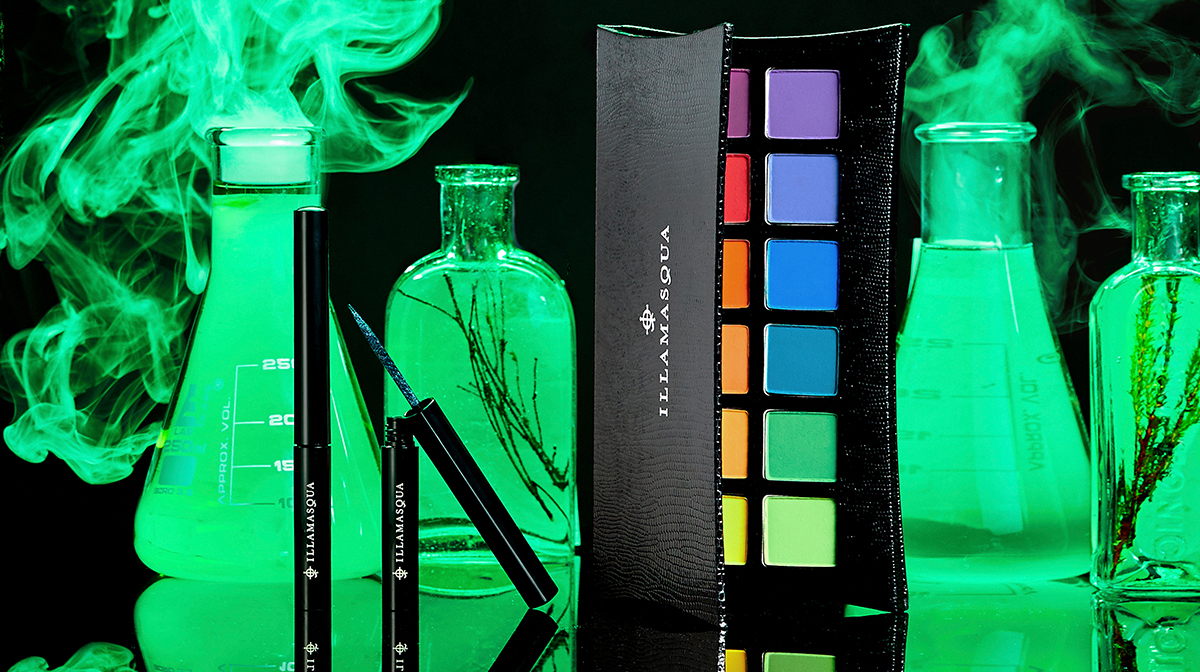
Did you hear the news? Illamasqua have just dropped their biggest collection ever in time for their tenth birthday, so we wanted to put their hottest launches to the test. We managed to grab a the Experimental Eyeshadow Palette and share it with the gals at HQhair’s head office to see how they’d use it. Keep scrollin’ to read our Illamasqua reviews.

HQ Tests: 10/10 Illamasqua Reviews

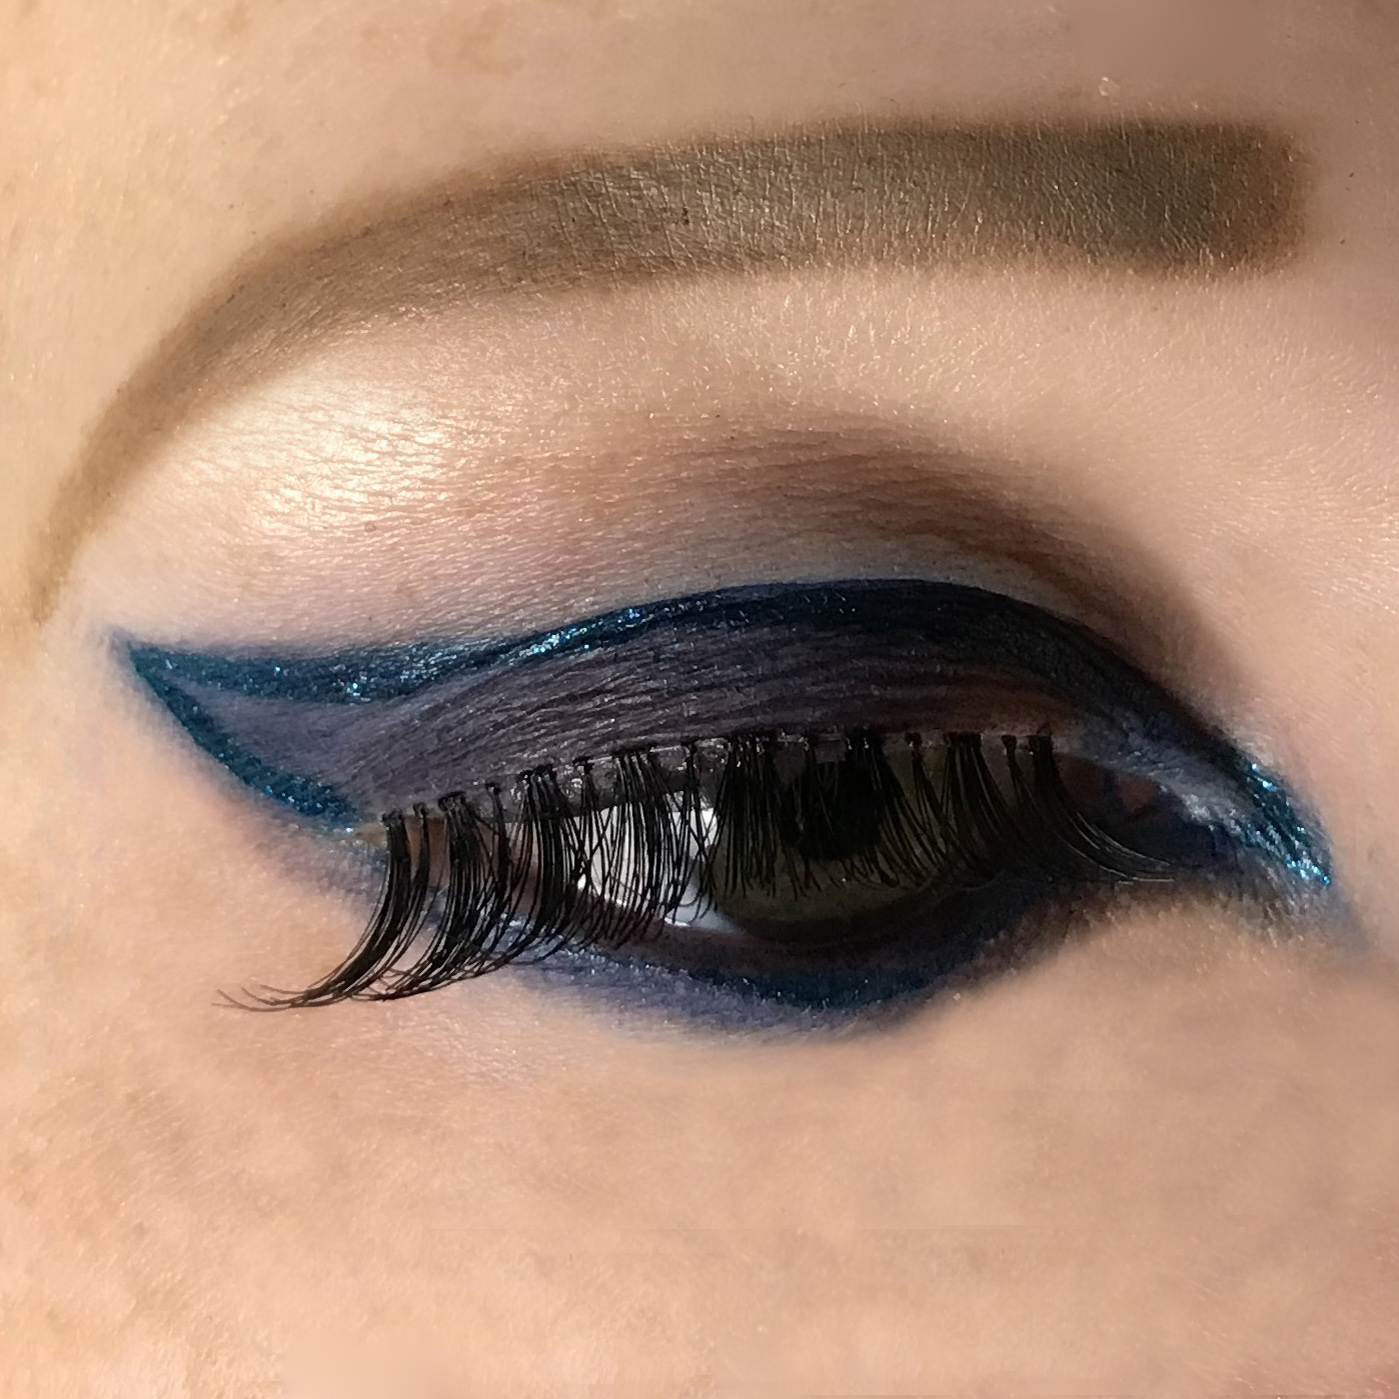
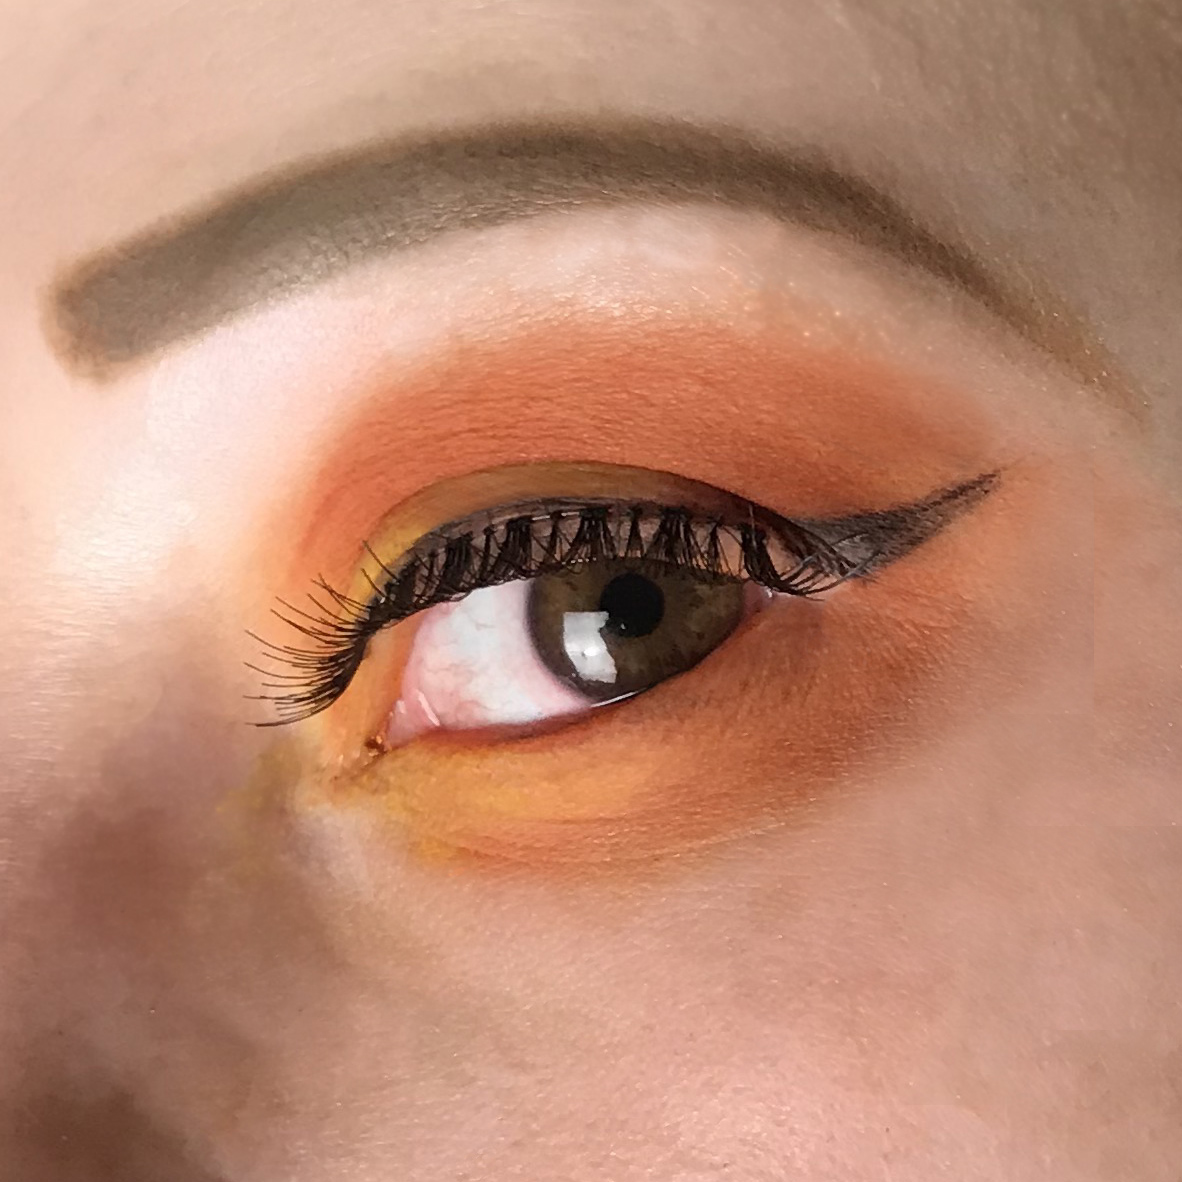
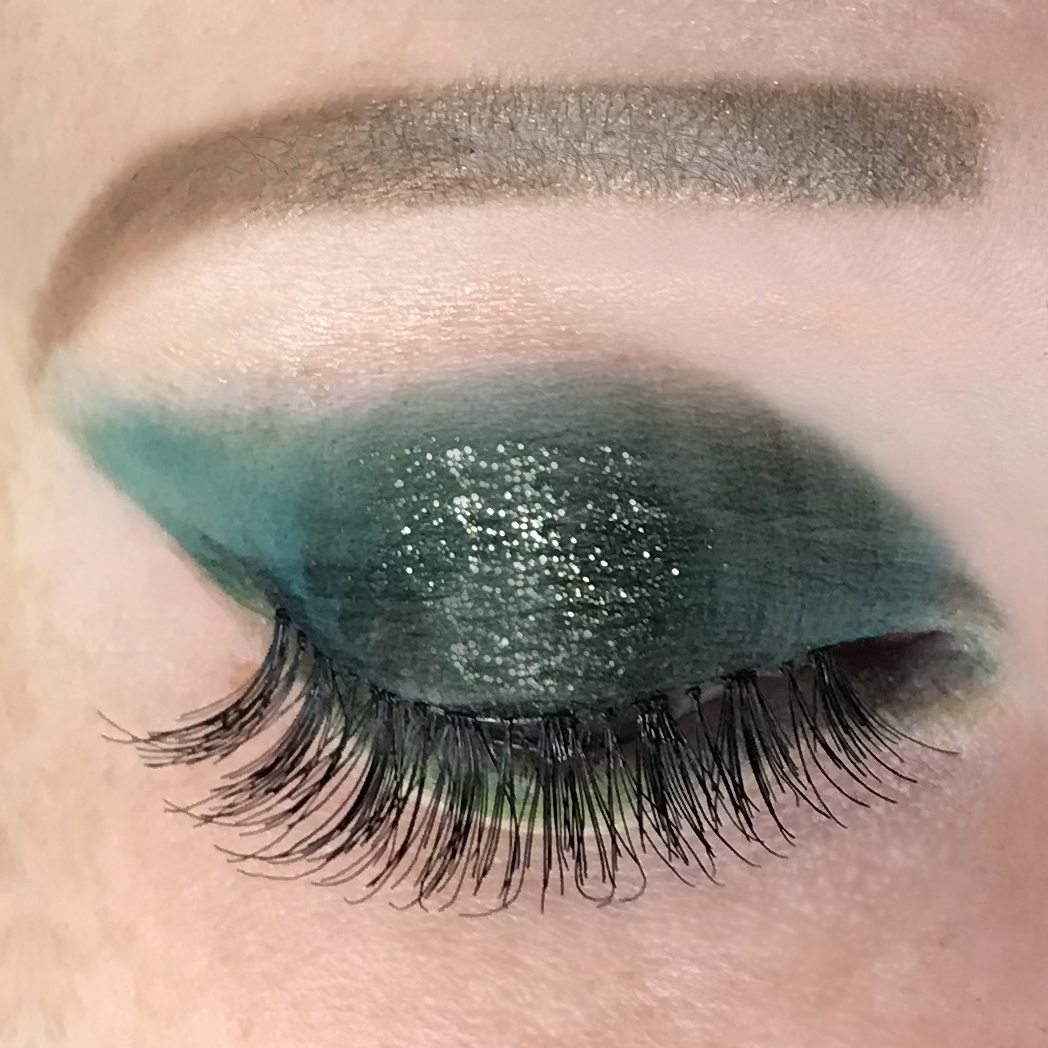
The newest Illamasqua eyeshadow palette is a mix of twelve bright coloured eyeshadows. Each eyeshadow is an incredibly pigmented colour, meaning a little goes a looong way, so expect this to become your go-to palette when you need highly pigmented colour ASAP.

Ranging from a warm-toned yellow right through to a deep red-undertoned mauve (a nod to ultraviolet being colour of the year), this is one of the best eyeshadow palettes to add-to-bag to encourage you to be a lil more experimental with your blending every day.

We created three different looks using different colours from the Experimental Palette, which is your fave?

Glitter Eyeliner with Navy Eyeshadow

Illamasqua Reviews | HQhair Blog

  1. Using a densely packed brush, pack the dark blue shade onto your eyelid. Blend out into a winged shape. Don’t worry about it being messy, we can tidy it up later.
  2. Take the deep mauve shade, and pack into the outer corner of your eye. Blend into the rest of your eyeshadow, and take a small amount under your eye onto the lower lash line.
  3. Using the Jewel Precision Ink Eyeliner in Charcoite, go around the edge of your wing – this is where you can tidy up any messy edges from earlier.
    Create an exaggerated flick outwards, and trace the eyeliner over your eyelid and through to create a point in the inner corner of your eye. Join the lines underneath the eye too, along the lower lash line.
  4. Finish the look with Illamasqua False Lashes – we used “Desire”.

Shop the Look

Warm Cut Crease

Illamasqua Review | HQhair Blog

  1. Taking the mid orange colour, sweep the bright eyeshadow across your eyelid, and blend up towards your brow bone.
  2. Using the darkest orange shade, blend into the crease. Make sure the two orange shades are blended properly, and transition into one another.
    Take a small amount onto your lower lash line, coming about two thirds of the way towards your inner corner.
  3. Using a flat brush, apply concealer onto the lid of the eye, creating a base for your cut crease. You want there to be a definite line between the orange shades and your eyelid.
  4. Once the concealer has dried, take the bright yellow eyeshadow and pack this on top of the concealer. Blend this into the inner corner of your eye, and bring to meet the orange on your lower lash line.
  5. To add a bit of definition, we’re going in with a brown eyeliner. Create a wing using the Precision Gel Eyeliner in Oblique with an angled makeup brush taking it about halfway across your lid.
  6. Finish the look with false lashes.

Shop the Look

Green Glittery Smokey Eye

Illamasqua Experimental Eyeshadow Palette Review | HQhair Blog

  1. Using the teal shade in the Illamasqua Experimental Eyeshadow Palette, pack pigment onto the eyelid in a winged shape. Take this onto your lower lashline too.
  2. Using the lighter green shade, pack this into the middle of your eye – both on the lid and lower lashline – and blend.
  3. Taking a flat brush, pat the gold glitter on top of the lighter green shade.
  4. Create a subtle wing with the black gel eyeliner.
  5. Finish with false lashes.

Shop the Look


Now you’ve read our Illamasqua reviews, it’s time to add some new stash to bag

Shop Illamasqua


Lookin’ for more? Read more of our HQ tests blog posts to see what we really think of these beauty products…

Best Black Lipstick | Grow Gorgeous ReviewBest Lipstick


Vanessa

Vanessa

Writer and expert